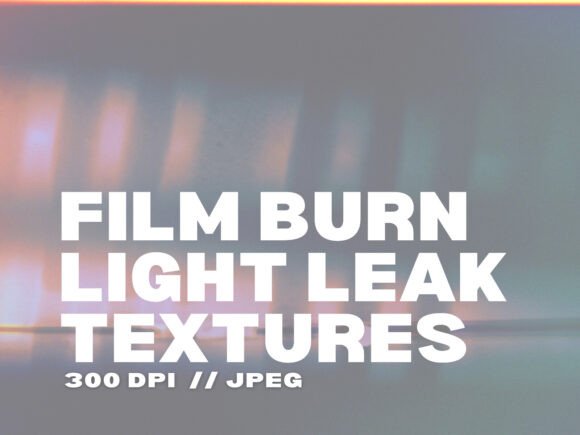
Add Cinematic Warmth with 24 Film Burn Light Leak Textures
There’s a specific quality to analog film that digital footage often misses. It’s not just grain or color grading—it’s the way light interacts with the physical medium. Those accidental flares, the warm bleed of color from a light source hitting the film gate, and the subtle burns that mark the beginning or end of a reel. These imperfections are what give film its soul. The 24 Film Burn Light Leak Textures collection is designed to bring that exact, authentic character back into your modern creative work. This isn’t a generic overlay pack; it’s a toolkit for injecting narrative and emotion into any project, from a quick social media post to a full video production.
Each of the 24 high-resolution JPG textures captures a different organic moment of light interaction. You’ll find warm, golden glows that mimic a sunset spilling into a lens, vibrant orange and red burns that suggest intense energy, and softer, more diffuse leaks that add a dreamlike haze. The textures are designed to blend seamlessly. Because they’re created from real light interactions, they have a natural falloff and an irregularity that synthetic filters can’t replicate. This makes them incredibly effective for adding depth. When you layer one over an image in Photoshop or Canva and set the blend mode to “Screen” or “Lighten,” the texture doesn’t just sit on top—it interacts with the underlying tones, brightening highlights and tinting shadows in a way that feels integrated and real.
Practical Applications Across Your Creative Workflow
The true value of a design asset like this lies in its versatility. These film burn textures are not a one-trick pony. They are a flexible component in a creative professional's toolkit, adaptable to a wide range of projects and software. The key is understanding how to apply them to serve your specific goal, whether that’s establishing a brand mood, enhancing storytelling, or simply making a visual more engaging.
For photographers and editors, this collection is a shortcut to a coveted vintage aesthetic. Applying a subtle warm leak to a portrait can soften the image, add a nostalgic glow to the subject’s skin tones, and create a cohesive, film-like color palette. It’s particularly effective for wedding, travel, or lifestyle photography where emotion is paramount. For videographers and content creators, the application is equally powerful. Using these textures as video overlays in editing software like Premiere Pro or DaVinci Resolve can instantly elevate raw footage. A quick drag-and-drop can give a corporate interview a more human, documentary feel, or transform a product video into something that feels like a cherished memory. The 300 DPI resolution ensures they hold up beautifully even in 4K projects.
For those in branding and marketing, the implications are strategic. Visual identity is built on consistency and emotion. If your brand’s personality is warm, authentic, creative, or nostalgic, integrating these film burn textures into your social media graphics, website banners, or email headers can reinforce that perception subconsciously. A consistent use of a particular color leak (say, a soft amber) across your Instagram feed can become a recognizable element of your brand identity. Similarly, for editorial design and packaging design, a well-placed texture can break the sterility of digital perfection, adding a tactile, artisanal quality to a magazine layout or a product label.
Integrating Textures into Your Design Process
Adopting a new element into your creative process should be intentional, not haphazard. Here’s a practical guide to using the 24 Film Burn Light Leak Textures effectively. First, consider the visual hierarchy of your piece. A texture should enhance, not overwhelm. Use a bold, heavy burn to draw the eye to a specific focal point, like a logo or a key headline. Use a softer, more diffuse leak to create an overall mood without competing with your main content. This is where understanding blend modes is crucial. “Screen” will primarily affect the highlights, making it ideal for light leaks. “Overlay” can boost contrast and saturation. “Soft Light” offers a more subtle, integrated effect.
Next, think about font pairing and readability. This is critical. If you’re overlaying a texture onto a design with text, you must ensure the text remains legible. A heavy, colorful burn directly behind a paragraph of body copy will destroy readability. Instead, apply the texture to the background or to a large image, and keep your typography in cleaner areas of the composition. The textures work beautifully alongside a range of typefaces. A clean sans serif font can provide a modern counterpoint to the vintage texture, creating a compelling tension. A classic serif font can lean into the nostalgic feel. A script font or handwritten font paired with a soft leak can enhance a personal, romantic aesthetic for invitations or personal blogs.
Finally, always test and evaluate. The collection includes 24 options for a reason. Don’t just use the first one you see. Open a few and experiment. A fiery red burn might be perfect for a music poster but jarring on a wellness blog. A subtle golden glow might be ideal for a real estate photo but too faint for a bold social media ad. View your project at full size and from a distance to see how the texture affects the overall composition. The commercial license is straightforward—no attribution required—so you can use them freely in client work, merchandise, and digital products. They are design assets meant to be used, not just admired.
Why These Textures Outperform Generic Filters
Many editing apps offer built-in “vintage” filters. The difference with the 24 Film Burn Light Leak Textures is control and authenticity. A filter applies a blanket effect to your entire image. These textures are separate layers. You can erase parts of the texture, mask it to specific areas, adjust its opacity, change its color, or combine multiple leaks from the collection. This level of control is what separates a amateurish filter from a professional-grade design asset. You’re not just applying a preset; you are actively crafting the light and mood of your piece. This is the difference between following a trend and developing a signature style. Whether you’re a small business owner creating your own marketing materials or a designer building a client’s brand identity, having tools that offer this kind of nuanced control is essential for producing work that feels considered, unique, and emotionally resonant.